Tutorial overview
We will need a compiler and some extensions to write c++ code and run it using the VS code. Here we will use the GCC compiler with the help of Code::blocks. So after following this tutorial, you can run your C/C++ code on both VS code and Code::Blocks. After successfully installing the GCC, we will install some necessary extensions that will help us to run the C/C++ code, and it will help us to write optimized code. Here are the steps you have to follow:
Install Proper Code::Blocks to Get GCC Compiler
We have to install Code::Blocks with the MinGW. To do that, go to Code::Blocks download, then download the "codeblocks- (Current version number) mingw-setup.exe."
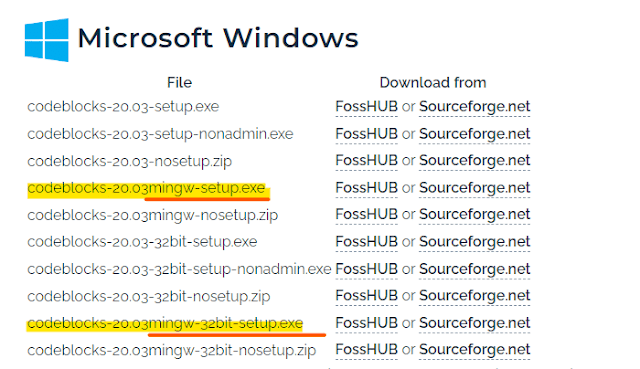
After downloading, you have to install it. It is better to install it in the system default drive. Check everything when you are installing Code::Blocks. After installing, you can run a Hello World program to check if it's working or not.
Environment Variable Setup
You must set the environment variable to access the MinGW from your system drives. Before doing this, you should check if it already exists or not. To do that, open your command prompt and run the command 'gcc --version', and it gives any version-related info that means it's already there. Otherwise, you have to set the GCC accessible from anywhere. Here are the steps you have to follow:
- First, go to the Program Files (of the drive where you installed the Code::Blocks, in default, you will find it in the C drive)
- Go to CodeBlocks> MinGW> bin
- Copy the path
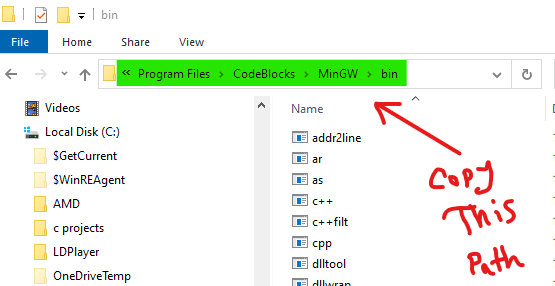
After copying, the path will look like that "C:\Program Files\CodeBlocks\MinGW\bin". To set that path as an environment variable, search 'Edit the system environment variables' in the windows search bar.
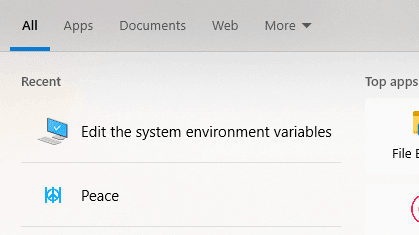
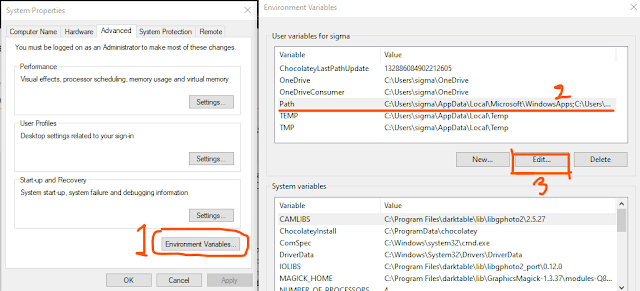
Then go to the 'Environment Variables', select 'path', and click on the 'edit'
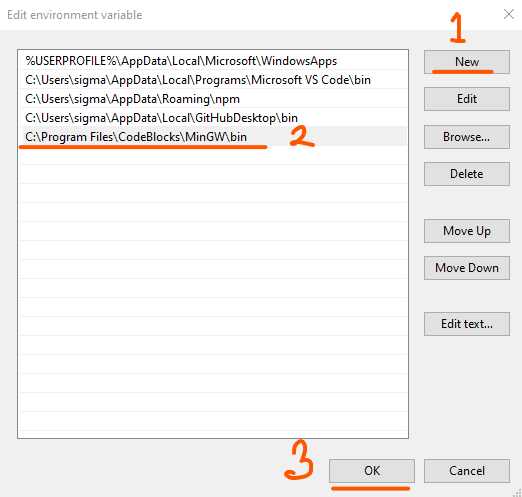
Now you have to set the path you copied from the file explorer previously. Then hit save and ok.
Then you can open the CMD and run the 'gcc --version' command to check if the GCC is working correctly.

If it shows the version number, then your 50% work is done. Now you can move to the next step.
Install Required Extention for C/C++ in VS Code
We will need some extensions to run the C or C++ code on VS code. They will help us debug, build, highlight code, and many more. The first extension we need is Code Runner.

This extension helps us to run/work with C, C++, Java, JS, PHP, Python, Perl, Ruby, Go, Lua, Groovy, PowerShell, CMD, BASH, F#, C#, and many more. The next extension we need is C/C++ Extension Pack by Microsoft.

This extension will install the necessary extension to run a c or c++ program. You don't have to think about the extensions for the c program.
For a better command line interface experience, you can use Powershell. This will provide you an excellent command line interface. You can access it from the terminal section of vs code.

That was some necessary extension for visual studio code to start with c or c++ in vs code. Many extensions will give you an excellent coding experience. For example, you can test themes for a good-looking interface.
Run Your First C/C++ Code on Visual Studio Code
After completing the steps above, your system can run the C/C++ code using VS code. Here are 3 steps you can follow to run C/C++ code on VS code:
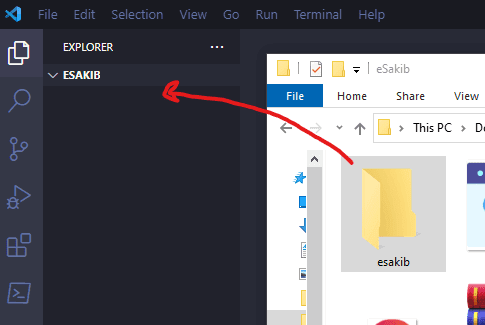
Step1: Create a folder in any drive. Drag and drop that file into the visual studio code.
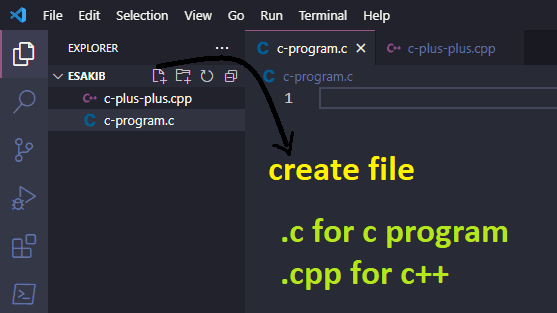
Step 2: Create files inside the folders using the proper C/C++ file name guideline with the proper file extension. Use '.c' for C program and '.cpp' for C++ program.
Step 3: Write a program using the run icon (top right side). First, it will build the project then it will run that program. You will see the build status in the terminal section and outputs in the output section of the terminal.
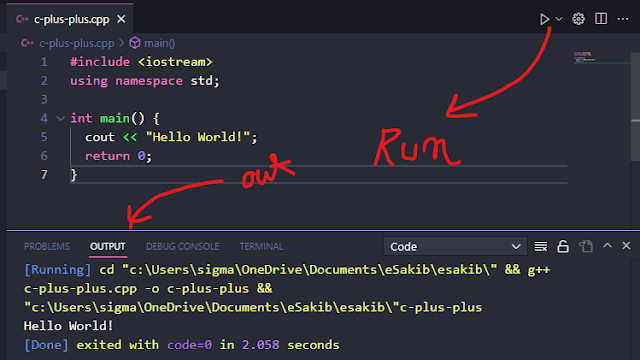
That's how you can run a C/C++ code in the visual studio code. If you face any problems related to this, you can comment below. I will try to solve that for you.